 Course/Community Requests
- Courses are specific to semester, course number, and (optionally) section(s).
- You may incorporate automated enrollment of registered students from the Registrar (see below).
- Courses can be cloned from any course you previously taught or have permission to clone (see below).
- Your request will result in automatic creation of a new LON-CAPA course if either of the following are true:
- You are listed in CLIFMS as faculty instructor or course supervisor for the particular semester instance of the course.
- You are listed in the Registrar's Office Online Instructor Systems as Department Administrator with current access to Class Lists for all courses in your department -- see: Administrator Information
Contents
- Login and Go to Main Menu
- Select Course/Community requests
- Request an official course
- Designate course
- Optionally select course to clone
- Choose student access date range
- Optionally add course personnel
- Review course request settings and submit request
- Configure Course Enrollment through the Automated Enrollment Manager
- Granting Cloning Privileges for Another Instructor
- Getting Help
Login and Go to Main Menu
Log-in to LON-CAPA. Go to the Main Menu.
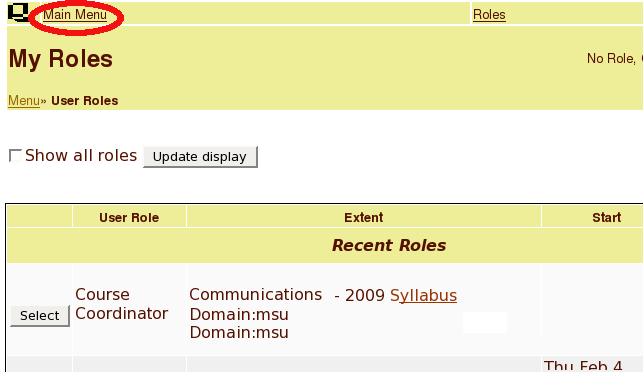
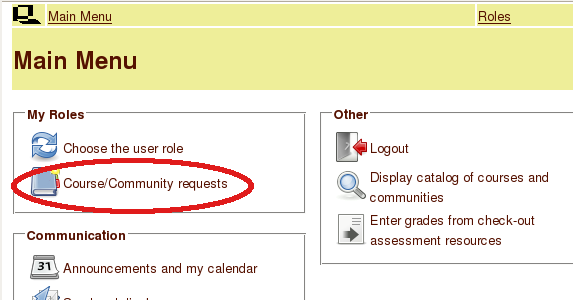
Select Course/Community requests
Select Course/Community requests. Only MSU faculty have the option to create official MSU courses. If a graduate student instructor has been assigned to teach an MSU course (e.g., a summer course) the student should contact the LON-CAPA Helpdesk and ask to be granted privileges to request creation of official MSU courses.
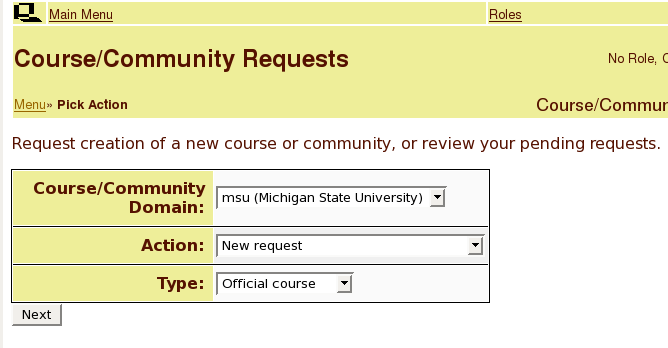
Request an official course
Choose 'msu' for the domain, 'New request' for the action, and 'official course' for the type. Click Next.
Designate course
Choose the year, semester, and department for the course you wish to create. Enter the course number for the course. Click Next.

Optionally select course to clone
You should see in green lettering that the course you chose is valid. Optionally edit the course description.
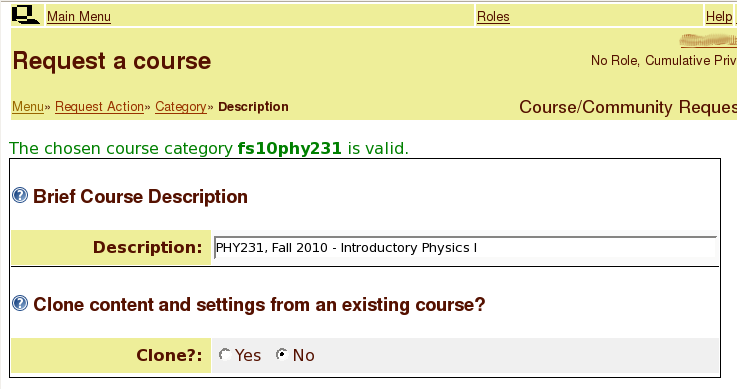
If you wish to clone a course you have permission to clone for your new course, Select Yes. Otherwise, leave it no.
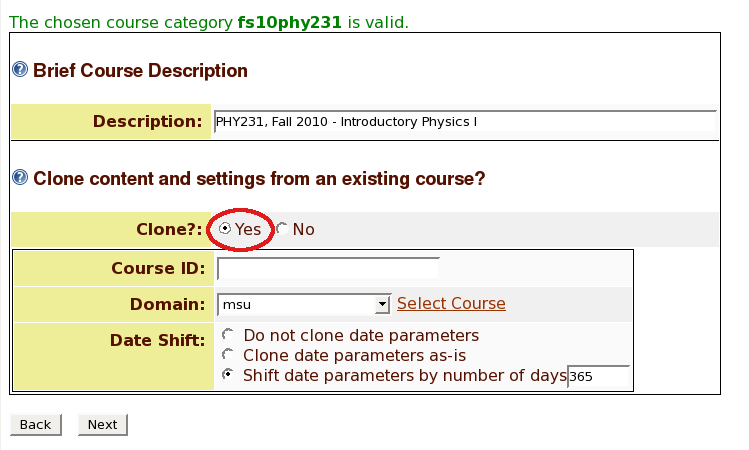
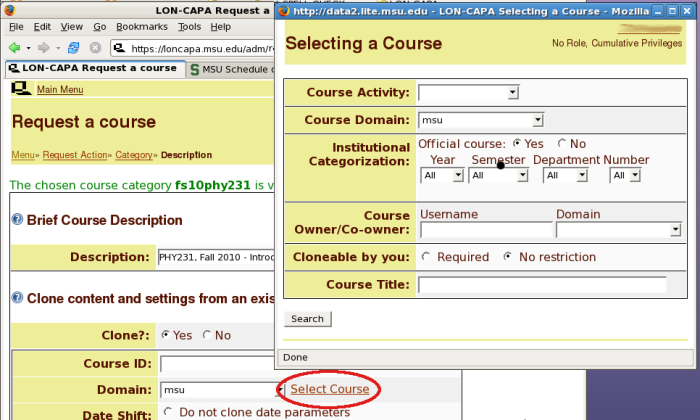
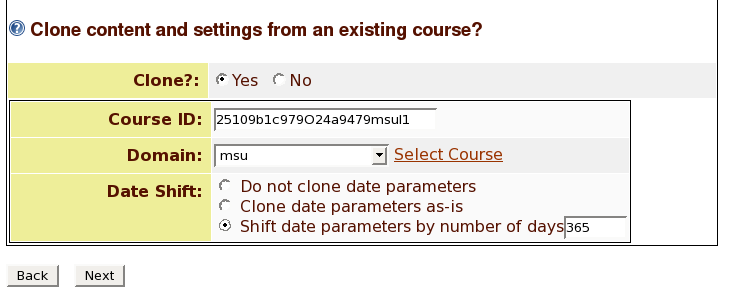
If you select 'Yes,' a new menu will appear. Click the 'Select Course' link to select the course you wish to clone. A pop-up window will appear. Use this window to search for the course you wish to clone. After clicking the Search button, a list of search results will appear. Select the appropriatae course. If you are not allowed select the course you wish to clone, you will need to ask the course owner that is listed in the search results to give you permission to clone the course. Instructions for granting cloning permission are available further down this page. Select the course and the window will close.
Next, choose if you do not want to 'clone date parameters' (you will have to create open, due, and answer dates later), 'clone date parameters as-is' (not recommended, it is likely that the course you are cloning will have answers open to be viewed), or choose the option to 'shift date parameters by a set number of days' (if you get the number of days wrong, you can always shift the days in your new course by visiting the parameter settings off of the main menu). Click Next.
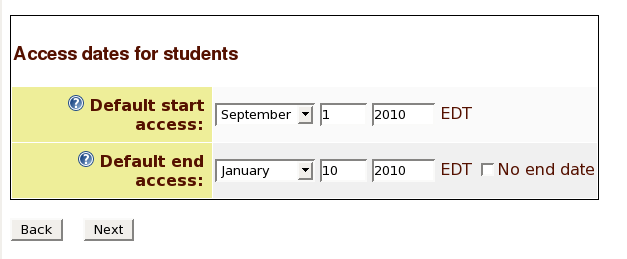
Choose student access date range
Set the dates in which students can first and last access your course. For example, if it is July, you may not want students to be able to access the course until the first day of classes in August.
Optionally add course personnel
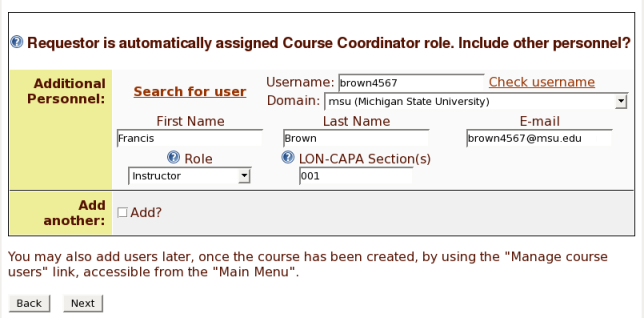
By default, you as the requester will be made the course coordinator in your course. Optionally grant other users access to your course. For example, you can add your colleague as a Course Coordinator, your graduate assistants as Instructors, and your undergraduate assistants as Teaching Assistants. If you know the user's MSU Net ID, enter that into the Username field and click the link that says 'Check username.' Assuming you entered the MSU Net ID correctly, a pop-up window will appear with the username you entered. Click select. The first name, last name, and e-mail fields will automatically be filled-out with the correct information. If you do not know the MSU Net ID, click the link that says 'Search for user.' A pop-up window will appear that will help you search for the user. It is recommended that you choose the option 'in institutional directory for selected domain' in the Search criteria section. This way, if the user you are looking for doesn't have a LON-CAPA account, you will be able to find the MSU affiliate in the MSU institutional directory.
Choose the appropriate Role for the user. Optionally enter the section. Course Coordinators do not need a section. If the section field is left blank for Instructors or Teaching Assistants, then the Instructor or Teaching Assistant will have permission to access all sections. Otherwise, you must add a role for each section. For example, if brown4567 is supposed to be an instructor for section 001 and 012, then you will need to add two roles for this person, Instructor for section 001 and Instructor for section 012. Check the 'Add?' option to add additional personnel to your course. You may also add users later, once the course has been created, by using the 'Manage course users' link, accessible from the 'Main Menu.' Click Next.
NOTE: If you will be co-teaching a course with multiple sections, each person designated an official instructor for the various sections you wish to co-teach, must be added as a course coordinator in order for the auto-enrollment to add students from all appropriate sections.
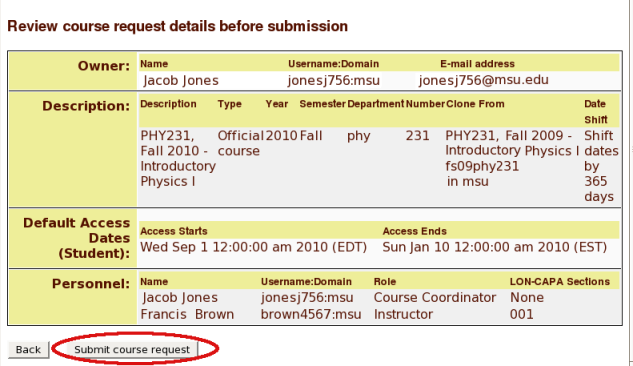
Review course request settings and submit request
Review your course request and click the 'Submit course request' button to submit your request. If your course is not automatically created, contact the helpdesk.
Configure Course Enrollment
Automated enrollment will only run if you are listed in CLIFMS as the the official instructor or course supervisor for the course.
Automated Enrollment Manager
Configure Automated Course Enrollment by Entering your new course as Course Coordinator (you may need to log out and log back in to see it). Go to the Main Menu and choose the option 'Manage Course Users.' From the Course Management screen, choose 'Automated Enrollment Manager.' The following menu items are available to configure:
- Use "Automated adds/drops" to enable or disable automatic nightly adds or drops in your LON-CAPA course based on institutional enrollment information.
- Use "Change enrollment dates" to change the date of first automated enrollment and/or the date of last automated enrollment for registered students.
- Use "Change access dates" to change the default start and/or end dates for student roles created by automated enrollment.
- Use "Notification of changes" to enable or disable notification of enrollment changes and to add or remove course coordinators from the recipient list.
- Use "Change crosslisting" to include or exclude enrollment from crosslisted classes.
- Use "Section settings" to make changes to the choice of sections included for enrollment in your LON-CAPA course and to edit section ID.
- Use "Student photo settings" to enable or disable automatic import of photos for registered students in your course.
- Use "Update roster now" to add and/or drop students from your course based on the most current institutional classlist information.
- Use "Update student photos" to import your institution's most current digital photos for registered students in your course.
- Use "View students and change type" to display the current course roster, and (optionally) change enrollment type for selected students from 'auto' to 'manual' and vice versa.
Automated Enrollment for Team Taught Courses
If you want one LON-CAPA course for multiple sections with different official instructors for each section, the instructor who requested the course must grant the role Course Coordinator for all official instructors listed in CLIFMS for the sections you wish to combine in one course.
Frequently Asked Questions Regarding Enrollment
- I requested a course, but enrollment does not work.
Check with your department to see if you were added to CLIFMS as the official instructor. The official instructors in CLIFMS for all sections you wish to enroll need to be in course coordinators in the course. After getting added to CLIFMS and adding all the necessary course coordinators, automated enrollment should start working that night for the other sections assuming you requested automated enrollment. You can also visit the Auto Enrollment Manager for your course and update your classlist immediately.
- I created my course for my section, but have now decided to team teach.
If you plan on using your course for a team taught course, you will need to grant the role Course Coordinator for all official instructors listed in CLIFMS for the sections you wish to combine in one course. You then need to visit the User Management page off of the LON-CAPA Main Menu and choose the Automated Enrollment Settings page. From here, you can change which sections you wish to automatically enroll.
Granting Cloning Privileges for Another Instructor
- Become course coordinator for the course you want to grant cloning privileges.
- Go to the Main Menu.
- Choose the item 'Modify course configuration.'
- Check the option for 'General course settings.' Then click the Display button.
- There is a field to specify a specific user to clone your course. Enter
username:domain into this field. For example, if the username is smith1234, you would enter smith1234:msu into the field.
- You may also want grant permission to all users with rights to create courses in a domain to clone your course.
- Click Save button.
Getting Help
If you need additional help, submit a help request.
(Top)